Category Archives: Appetizers

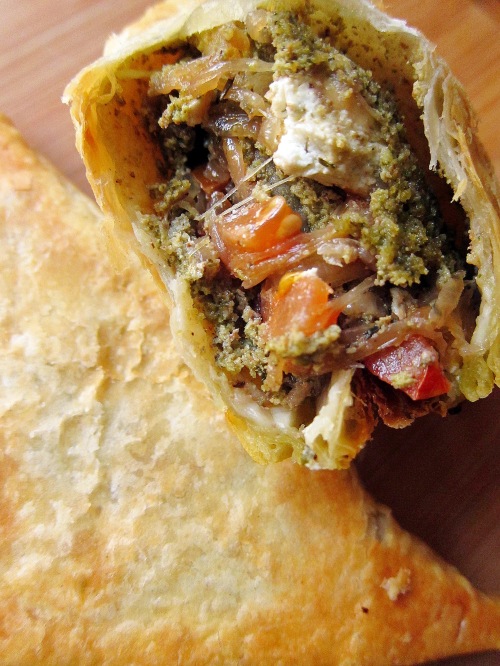
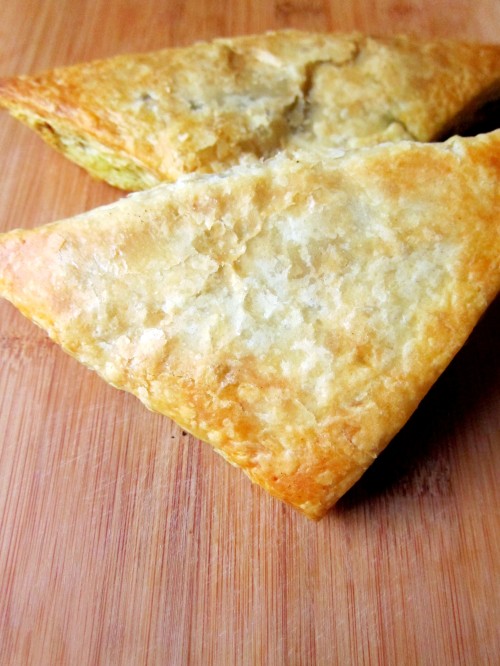
Goat Cheese, Pesto & Caramelized Onion Triangles

IMG_2921

To be honest, I wasn’t sure what to call this.  If Awesome Puffs was a bit more descriptive, I would have said that.  

I recently went to a party that served no food.  A birthday party.  Not even cake.  Just bottled water – and a shortage at that.  Booze would be a distant dream.  I was stupefied.  In all fairness, I do have a tendency to go overboard with the food.  Feeding people is my passion.

With that said, if you come to my house for anything, I will do everything in my power to feed you.  Whether I cook or order in, you will not leave without eating.  If this rouses images from Misery, I wouldn’t blame you.  I even gave my FedEx guy muffins!

Why you ask?  Could it be that my mom will absolutely take offense and give you the stink eye if you don’t eat at her house?  Or could it be that I myself would want to eat if I went to someone’s house?  Whatever the reason, we all benefit with food.  And these triangles.

IMG_2918

What started out as a random experiment turned out to be a family and guest favorite.  These pastries are easy to assemble and easy to store in the freezer for lunch, guests or a great filling snack.

Goat Cheese, Pesto & Caramelized Onion Triangles

yields 8 pastries

Ingredients:

Directions:


  1. Preheat your oven to 400F.
  2. Unfold your puff pastry sheets (working one at a time) onto a lightly floured surface.
  3. Most puffed pastry sheets I worked with already come divided in four.  If so, just separate at the perforations.  If not, roll out to about 16 inches and cut into four squares.
  4. On each puff pastry squares (you should have 8), spread with a tablespoon of pesto on one half of the triangle, leaving about 1/2 inch border on the puff pastry.
  5. Top with approximately a tablespoon of goat cheese, tomatoes, and onions.  Just put enough that you can close the triangle without tearing.
  6. Fold the clean part of the triangle over and crimp around the edges with a fork.
  7. Repeat with all remaining squares until you have 8 triangles.
  8. You can freeze at this point in a airtight container or bag.
  9. Bake in a parchment-lined baking sheet for about 20-25 minutes, until golden brown.
  10. Allow the pastries to cool on a cookie rack so they maintain their crisp crust.
  11. If you have extra ingredients, make a sandwich! 🙂

8 Comments

Filed under Appetizers, baking, Favorites, Lunch, Vegetarian

Roasted Chickpeas

IMG_2850

Combining a dedication to eating well while having game-watching get-togethers can be challenging.  Game-day snacks don’t necessarily have to be a diet-wrecker.  For instance, this snack has been an instant favorite in my house.  Not only have I been eating it by itself, I throw it in salads for added nutrition with a wonderful crunch.

IMG_2857

I have experimented with this recipe for a while and for crunchier chickpeas, it’s important to roast the chickpeas without coating in oil.  Call me crazy, but the oil seals in the moisture.  As such, first roast and then coat.  The spices really can vary based on what you want – savory or sweet.  I can’t wait to try a cinnamon sugar twist on this snack favorite.

Roasted Chickpeas

adapted from Steamy Kitchen

Ingredients:

  • 1 (15 oz) can of chickpeas
  • 1 tbsp olive oil
  • 1 tsp smoked paprika
  • 1 tsp salt
  • 1 tsp cumin
  • 1/4 tsp ground black pepper
  • 1 tsp garlic powder
  • 1/2 tsp chili powder (not the same as cayenne pepper)

Directions:

  1. Preheat oven to 400F.
  2. Drain the chickpeas in a colander and rinse with cold water.  Dry in between paper towels.  Using a paper towel, to press on and soak up the water and loosen the skin from the chickpeas.  Discard the skins.
  3. Roast the chickpeas for 30 minutes, until crispy.  Stir every 10 minutes.
  4. While baking, whisk together the olive oil, paprika, salt, cumin, black pepper, garlic powder, and chili powder until fully incorporated.  Remove from the oven and pour into the bowl and stir to coat.

4 Comments

Filed under Appetizers, baking, Snacks, Vegan

Guacamole

IMG_2842

True to toddler form, my child’s eating habits are variable at best.  Foods that he loves one day becomes old news the next.  One constant in his life (and mine) has been guacamole.  I attribute it to the fact that I probably consumed guacamole more than I care to admit while I was pregnant and nursing.  Chipotle should have just been on my speed dial.  This has to be one of my favorite dishes – ever.  Similar to other dips, I can and have (on numerous occasions) made a meal of chips, guacamole and salsa.  What can I say?  I’m a Texan through and through.

I’m quite particular about what constitutes great guacamole.  Unlike most places that use tomatoes in their guacamole, I am harshly opposed to that ingredient anywhere near this dish.  Tomatoes add too my liquid and a distracting element to the dish.  Also, I’ve tried almost every onion type (shallots, green onions, white, etc.) and nothing seems more compatible with avocados quite like red onion.  Also, I prefer the taste of serrano as opposed to jalapeno in guacamole but serrano is spicier.  So, pick your pepper accordingly.

IMG_2839

Most telling is that my husband, who really hates most things avocado, ate this happily.  Happily.  Not out of any obligation to consume this nutrient-rich food with wonderful healthy fats.  Happily.  And, nowadays when there is a dish that all three people in the family love – mission accomplished.

Guacamole

yields 4 servings

Ingredients:

  • 2 large (or three small) ripe avocados
  • 1/4 cup red onion, minced
  • 1/4 cup cilantro, finely chopped
  • 1 tsp kosher salt
  • 1 jalapeno or 1/2 serrano pepper, minced (seeded if you want less spicy)
  • juice from 1 lime (about 3 tbsp)

Directions:

  1. Cut the avocado in half and scoop the flesh into a large mixing bowl.  Using a fork, mash or stir around until you reach a consistency slightly thicker than what you ultimately want.  (I prefer a whipped texture that only has a few chunks of avocado in it.)
  2. Stir in onion, cilantro, salt, pepper and lime juice.  Start with one half the lime and then add in more as  you want.  Stir until fully incorporated.
  3. Taste for salt and lime and add as necessary.


10 Comments

Filed under Appetizers, Favorites

Baba Ghanoush (Eggplant Dip)

Often, I think about how much my life has changed. From living alone, to being married and living with a Binks, and now with a baby, who needs a full meal in between nursing sessions.

When we were first married, our dinners consisted of chips and dip or appetizers. Full meals were saved for special occasions or weekends when we had time and no work. Or really when I felt like it. Oh the luxury of “feeling like it”. Nowadays, I’m making more of an effort to put a complete meal on the table that’s also good for the baby.

On those rare Saturdays, when the baby actually goes to (and stays) sleep at the right time, Binks and I attempt to recreate those days. We pick a movie, a glass of wine, a cheese with accompaniments. My favorite type is of course, chips or veggies and dip.

It’s no secret that I love Mediterranean food. I love the flavor profile and the use of whole foods that tastes absolutely fresh and light. I also love dip. So, whenever the opportunity presents itself that I can have both at the same time, I jump on it. Baba ghanoush is a very welcome dip in our house. When we have a full on meal, we serve it with hummus, falafel, quinoa salad, tzaziki sauce, pita, rice, and on special occasions, baklava. But, more likely than not, I make a meal out of fresh toasted pita and baba ghanoush.

A glass of red wine on the side and it’s a great meal.

Baba Ghanoush

adapted from David Lebovitz

serves 2-3 people

Ingredients:

  • 1 medium-sized eggplant
  • 3 tbsp tahini
  • 1 tsp kosher salt
  • 1 tbsp fresh-squeezed lemon juice
  • 1 clove garlic, finely minced
  • dash of cayenne pepper (optional)
  • 1 tbsp chopped parsley leaves

Directions:

  1. Preheat oven to 400F.
  2. Poke eggplant all over with a fork, and place on foil lined baking sheet. Roast until very tender, about 45 minutes. Remove from the oven and place in a heat-safe bowl. Cover with plastic wrap.
  3. After 15-20 minutes, and after the eggplants have cooled, peel the eggplant and place the flesh into a food processor.
  4. Add remaining ingredients and puree in processor until smooth.
  5. Taste for salt and lemon. Add more, if desired.
  6. Serve with a drizzle of olive oil, sumac, and/or parsley leaves.

5 Comments

Filed under Appetizers, Vegan, Vegetarian

Tortilla Rollups

I think back and laugh at my high school self.  So immature and just plain stupid.  I remember the day I went to see the Backstreet Boys in concert, my first concert ever.  A friend of mine scored free tickets off the radio (something that would never happen to me), and after considerable begging, my dad let me go.  My sister was totally jealous.

After belting “I Want It That Way” and “Larger Than Life” with a group of girls younger than me, and attempting to get the attention of my dream man, Kevin, I was hoarse the next day.  At church, I bragged to anyone that would listen that I went to the concert.  Aside from my little sister who was interested in Nick, no one cared.  Still reeling from the experience, I went to school on Monday and told everyone.  As if I wasn’t uncool enough, I really solidified my place on the high school popularity totem pole, right above the algebra teacher.

I had these tortilla rollups for the first time in high school.  Specifically, a classmate made them for the Spanish class potluck.  While I promised myself I would make these forever and always, like my interest in Backstreet Boys, I have only had these at get-togethers.  I recently made them – just for myself and I swear on Kevin that it is wonderful.

Tortilla Rollups

Ingredients:

  • 1 (8 oz) package cream cheese, softened
  • 1 tbsp shallots, minced
  • 2 tbsp parsley, minced
  • 1 clove garlic, minced
  • 1/2 cup bell peppers (use either red, yellow, and orange – or a mixture of them), minced
  • 1/2 cup celery, minced
  • 1 tbsp kalamata olives, minced
  • 1/4 cup Parmesan cheese, finely grated
  • 1/4 tsp of Tabasco sauce
  • salt and pepper to taste
  • 5 large flour tortillas

Directions:

  1. Mix together cream cheese, shallots, parsley, garlic, bell peppers, celery, olives, Parmesan, Tabasco, salt and pepper.  Cream until well combined.  Add more salt if necessary.
  2. Spread a thin layer on each tortilla.  Roll up the tortilla tightly and set on a plate.  Once finished spreading and rolling, place the tortillas in the fridge for an hour to set.
  3. Slice each into 1/2 inch slices, and serve.

7 Comments

Filed under Appetizers, Vegetarian

Creamy Herb Dip

Whether just for snacking, or for a quick appetizer for a gathering or just because you feel like it, it’s always nice to have a herb dip in your recipe belt.  While I usually pair veggies with hummus, this dip is a great alternative to my usual.  In addition, I’m more likely to have these ingredients on hand at all times.  And, for my veggie-hating friends, this also pairs nicely with water crackers and my favorite kettle sea salt potato chips.  But, this creamy – dare I say zippy – dip is just magnificent with fresh-cut vegetables.

I actually served this to a veggie and mayo-hating friend of mine.  As he ate the dip with chips, he gave it rave reviews.  The ingredients mesh to be greater than the sum of themselves.  What that means is that he didn’t taste any mayo or the shallots, which is an ultimate no-no.  Without masking each other, every ingredient plays a role and shines through in this cohesive dip.

Herb Dip

adapted from Ina Garten

Ingredients:

  • 1 (8 oz) package cream cheese, room temperature
  • 1/2 cup sour cream
  • 1/2 cup mayonnaise
  • 2 tbsp shallots, minced
  • 1 green onion, minced
  • 1 clove garlic, minced
  • 2 tbsp fresh parsley, minced
  • 1 tbsp fresh dill, minced
  • 1 tsp kosher salt
  • 3/4 tsp fresh ground black pepper
  • 4 dashes of hot sauce (i.e. Tabasco) – adjust to taste

Directions:

  1. Place the cream cheese, sour cream, mayo, shallots, green onion, garlic, parsley, dill, salt, pepper and hot sauce in the bowl of an electric mixer.  Mix on medium-high with the paddle attachment until all the ingredients are incorporated and smooth.
  2. Serve at room temperature.


10 Comments

Filed under Appetizers

Stuffed Mushrooms [ & Happy Birthday]

It’s my birthday today.  Not just any birthday.  I’m officially 30.  Big one right?  I find myself not caring.  I would say that it’s because I’m too busy with a baby and business to care, but I don’t think that’s quite it.  I think it’s denial.  As if now that I’m starting my 30s, I feel a sense of filing away my 20s and accepting all that’s happened in the file as the past.  And, that’s a lot of stuff .  Namely, all that revolves around my dad.  It’s hard to file away his passing as something that has happened.  While others around me make a deal about my birthday, the one thing that stands out is that this year, my dad will not call me to say “happy birthday.”  Although seemingly minute, birthdays are the one thing we grew up caring about.  My dad would make it a point – no matter where we were in life – to always call on our birthdays.  He didn’t care much for cards or presents (bummer when we were kids!), but the words were said.  And, genuinely so.  I fully intend on carrying this tradition forward.

These stuffed mushrooms were my dad’s favorite.  People love them, but I loved that my dad loved them.  He did not like cheese or cheese-y dishes.  (One of the many ways we are different.)  However, my stuffed mushrooms were the exception.  Over time, I have perfected these to be a family favorite.  I would venture to say that this recipe is sorta my thang.  I make these mushrooms at all get-togethers where there are a manageable amount of people.  What I mean by that is a feed-able amount of people.  I wanted to make these at my baby shower, but the amount of people (50!) would not have made this dish feasible.  Although the recipe creates 12 mushrooms, I expect everyone to eat at least 3.  Case and point – I made 12 for a group of 4 and we had no left overs.  While I stand behind all the recipes I post, this one is extra special.  It’s out-of-this-world delicious and surrounded by meaningful memories.  And, those kind of memories are not so easily forgotten.

Stuffed Mushrooms

– makes 12 mushrooms

Ingredients:

  • 12 whole white mushrooms
  • 2 tbsp olive oil
  • 2 tbsp garlic, minced (about 3 cloves)
  • 1 shallot, minced
  • 1/2 tsp black pepper
  • 1/2 tsp cayenne pepper
  • 1/2 tsp paprika
  • 1/2 tsp onion powder
  • 1/2 tsp garlic powder
  • 1 (8 oz) package of cream cheese, softened
  • 1/2 cup grated Parmesan, divided in half
  • 1/2 cup Panko bread crumbs, divided in half (or fresh bread crumbs)

Directions:

  1. Wash and remove the stems from the mushrooms.  Finely dice the mushroom stems.  Set aside.
  2. Heat pan over medium heat.  Add olive oil and heat.  Add the shallots, garlic and mushroom stems to the pan, and cook until the mixture is generally dry.  You want the moisture from the mushrooms to evaporate.
  3. Add black pepper, cayenne pepper, paprika, onion powder, and garlic powder.  Mix for 2 minutes.  Turn off heat and remove from the heat.
  4. Once removed from the heat, add the cream cheese, half of the Parmesan cheese (1/4 cup), and half of the Panko bread crumbs (1/4 cup).  Stir until everything is incorporated and combined.
  5. Pipe into the mushrooms.  Arrange mushrooms on a baking tray.  You can refrigerate or freeze the mushrooms at this point for later use at this point.
  6. When ready to bake, preheat the oven to 350F.
  7. In a small bowl, mix together the remaining Parmesan and bread crumbs.  Sprinkle over mushrooms.
  8. Bake for 20 minutes or until the tops are browned.

6 Comments

Filed under Appetizers, garlic, Life, Vegetarian

Local. Sustainable. Organic. A Garden-Inspired Menu

I have been very fortunate to come from and marry into a family interested in having their own vegetable gardens.  Every summer, I am pretty much guaranteed that my family CSA will supply me with organic vegetables once a week.  My in-laws, with acreage, have devoted a quarter of their land to harvesting their own vegetables.

The variety includes squash, potatoes, eggplant, cucumbers, okra, lettuce, spinach, chard, garlic, onion, cilantro, mint, tomatoes, green beans, pears, cantaloupe, chili peppers, and much more.  Needless to say that my grocery bill is substantially lower during this time of year.

Eating from the garden, in short, tastes better.  Much much better.  Fruits taste sweeter.  Vegetables taste fresher and just generally have more flavor.

As a gesture of gratitude, I cooked a meal to thank those that have given me more than just produce – but really a new way about thinking about cooking and quality of food.  This Foodbuzz 24×24 menu is comprised of local organic, sustainable or organic ingredients.

Menu:
Blueberry Mint Soda
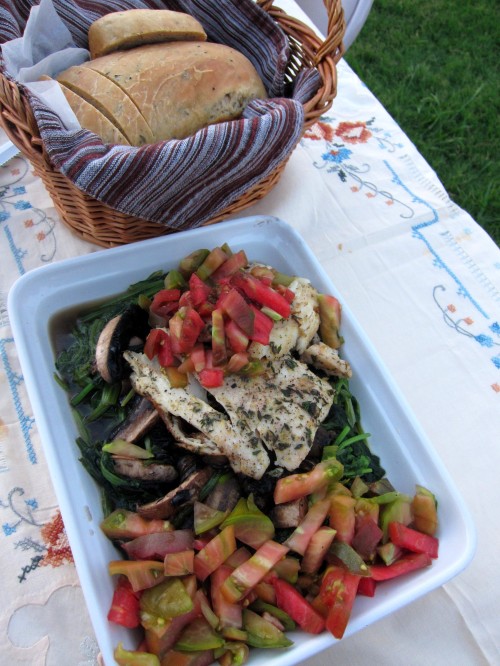
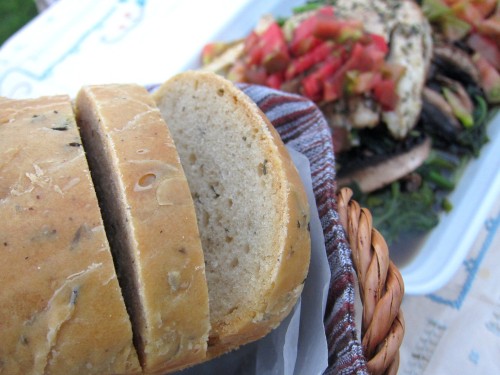
Rosemary Bread
Deviled Eggs
Fried Green Tomatoes
Warm Goat Cheese Salad with Balsamic Reduction
Pan-seared Halibut over Wilted Spinach, Texas Portobello Mushrooms and Tomatoes with a Citrus Shallot Dressing
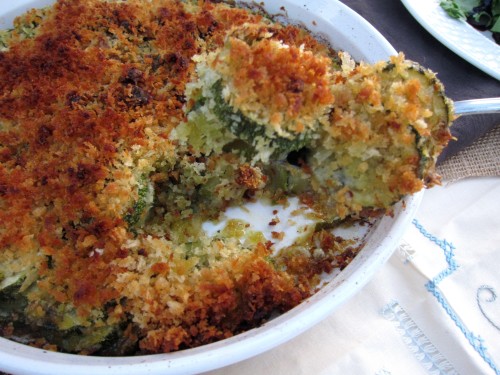
Squash Gratin
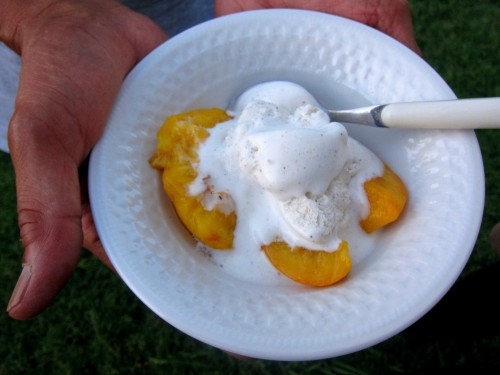
Peaches with Homemade Vanilla Bean Buttermilk Ice Cream

Served on a (fortunately) cooler Texas evening, we enjoyed this meal outside near the vegetable garden.  Served family style, this experience was more than a meal but a celebration of the people who dedicated themselves to feeding themselves and their families better.

When I first started grocery shopping and cooking for myself, thinking about where my food comes from was not even in my thought process.  In my mind, shopping at the big chain stores for cheaper blueberries and shopping at an organic store for duper expensive blueberries would yield the same result, the former just requiring an additional rinse under some cold water.

Well, times have changed and I’ve grown a bit wiser.  In this global world where any food is accessible year-round, I now focus on buying for the season rather than for the sale.  In the end, the product is not the same.

Instead of investing in produce that has traveled thousands of miles, I encourage you to check out your local farmer’s markets, join a CSA, buy seasonally, or grow a garden, no matter how small.  Growing and knowing the food you eat will change how you look at your plate.

7 Comments

Filed under Appetizers, Bread, Dinner, Uncategorized

Pimento Cheese

If you would have asked me 10 years ago if I liked pimento cheese, I would have said no. A strong harsh no. What I’ve seen in stores as a mayo-heavy cheese mixture with little flavor, never appealed to me in any sense. Never say never. A year ago, for lunch, at a mediation of all places, the mediator served a variety of sandwiches, including the pimento. I tried it. And, I loved it. Unlike the usual pimento cheese spreads, this had a distinct cheddar and pepper taste and was low on the mayo. After an hour, I realized I had eaten all the pimento cheese sandwiches on the platter. Luckily, my client was too nervous to eat or notice.

I have finally recreated a version that I am quote proud of and is delicious. I do not prefer creamier pimento cheese spreads. I like to have a substantial shred of cheddar cheese. My recipe is a twist on the classic. Adding shallots and pickled jalapeno for a crunch and kick. While you can certainly eat it the day of, I recommend letting it sit for at least two hours for the flavors to blend. I let it sit overnight and Binks agreed that the flavors settled better.

Pimento Cheese

Ingredients:

  • 1 pound sharp cheddar cheese, grated (best if you grate it yourself)
  • 1 (4 oz) jar of pimento cheese, diced
  • 1 small shallot, finely minced (optional)
  • 1 tbsp pickled jalapeno, diced (optional)
  • 1 tsp Dijon mustard (optional)
  • 1 tsp garlic powder
  • 1/2 tsp ground black pepper
  • 1/2 tsp cayenne pepper (optional)
  • 1/2 cup mayonnaise

Directions:

  1. Mix all ingredients together. Refrigerate for at least two hours before serving.

1 Comment

Filed under Appetizers, Side Dish, Vegetarian

Spinach Artichoke Dip

Spinach artichoke dip is pretty much a staple at most parties I attend.  I, however, didn’t jump on this dip-wagon until very recently – that is, when I played around with a recipe that has a lot of flavor.  (I can’t stand a bland, runny and stringy spinach artichoke dip.)

When Foodbuzz asked me to sample their new Classico Light Alfredo sauce (through the Tastemaker Program), I was thrilled – and around the time of my baby shower to boot!  I was thrilled to test out a lower-fat version of my favorite dip.  What’s not to love than a lighter version of our favorite recipes that doesn’t taste lighter?

I must say, that when it comes to Alfredo sauces, “light” usually denotes a product that tastes sweeter due to the lesser fat content and higher sugar content.  Lucky for me (and my guests), the Classico Light didn’t have this issue at all.

And, I know because I thoroughly enjoyed the leftovers – below is all that I had after the baby shower!

Spinach Artichoke Dip

Adapted from here

Ingredients:

–  1 jar of Classico Light Creamy Alfredo Sauce
–  1 tbsp granulated garlic
–  1 tsp red pepper flakes (adjust to taste)
–  1/2 (8 oz)  package of light cream cheese
–   1/2 cup Parmesan cheese, divided
–  1 tsp salt
–  1/2 tsp pepper
–  1 (14 oz) can of artichoke hearts, drained and chopped
–  1 (10 oz) frozen spinach, thawed and drained
–   1/2 cup mozzarella cheese, grated, divided

Directions:

1.  Preheat oven to 350F.
2.  Mix together all ingredients, except 1/4 cup of Parmesan cheese and 1/4 cup of mozzarella cheese.
3.  Spread mixed ingredients into an 8×8 baking dish.
4.  Mix the remaining 1/4 cup of Parmesan cheese and 1/4 cup of mozzarella cheese.
5.  Sprinkle on top of the mixed ingredients.
6.  Cover with foil and bake for 30 minutes.
7.   Uncover and bake for 12-15 minutes until bubbly and slightly browned on top.

4 Comments

Filed under Appetizers, baking, garlic, Uncategorized, Vegetarian