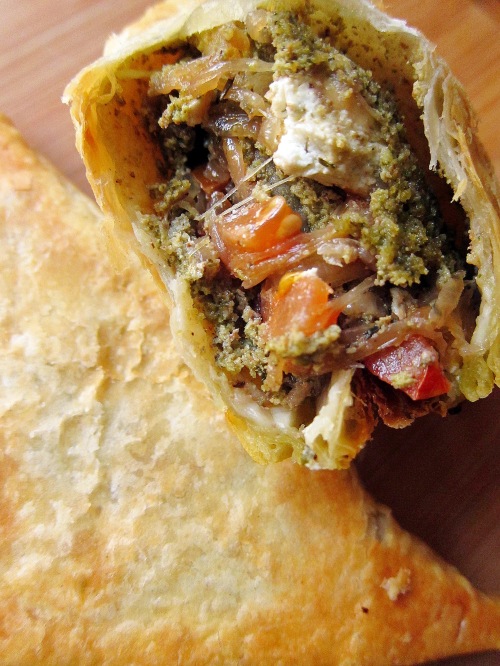
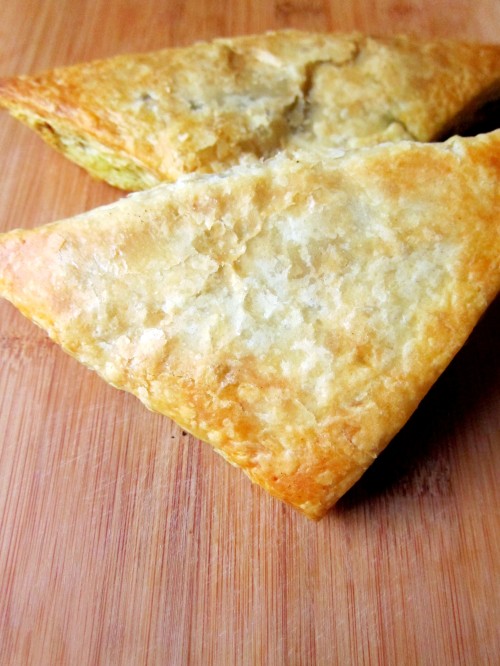
Goat Cheese, Pesto & Caramelized Onion Triangles

IMG_2921

To be honest, I wasn’t sure what to call this.  If Awesome Puffs was a bit more descriptive, I would have said that.  

I recently went to a party that served no food.  A birthday party.  Not even cake.  Just bottled water – and a shortage at that.  Booze would be a distant dream.  I was stupefied.  In all fairness, I do have a tendency to go overboard with the food.  Feeding people is my passion.

With that said, if you come to my house for anything, I will do everything in my power to feed you.  Whether I cook or order in, you will not leave without eating.  If this rouses images from Misery, I wouldn’t blame you.  I even gave my FedEx guy muffins!

Why you ask?  Could it be that my mom will absolutely take offense and give you the stink eye if you don’t eat at her house?  Or could it be that I myself would want to eat if I went to someone’s house?  Whatever the reason, we all benefit with food.  And these triangles.

IMG_2918

What started out as a random experiment turned out to be a family and guest favorite.  These pastries are easy to assemble and easy to store in the freezer for lunch, guests or a great filling snack.

Goat Cheese, Pesto & Caramelized Onion Triangles

yields 8 pastries

Ingredients:

Directions:


  1. Preheat your oven to 400F.
  2. Unfold your puff pastry sheets (working one at a time) onto a lightly floured surface.
  3. Most puffed pastry sheets I worked with already come divided in four.  If so, just separate at the perforations.  If not, roll out to about 16 inches and cut into four squares.
  4. On each puff pastry squares (you should have 8), spread with a tablespoon of pesto on one half of the triangle, leaving about 1/2 inch border on the puff pastry.
  5. Top with approximately a tablespoon of goat cheese, tomatoes, and onions.  Just put enough that you can close the triangle without tearing.
  6. Fold the clean part of the triangle over and crimp around the edges with a fork.
  7. Repeat with all remaining squares until you have 8 triangles.
  8. You can freeze at this point in a airtight container or bag.
  9. Bake in a parchment-lined baking sheet for about 20-25 minutes, until golden brown.
  10. Allow the pastries to cool on a cookie rack so they maintain their crisp crust.
  11. If you have extra ingredients, make a sandwich! 🙂

8 Comments

Filed under Appetizers, baking, Favorites, Lunch, Vegetarian

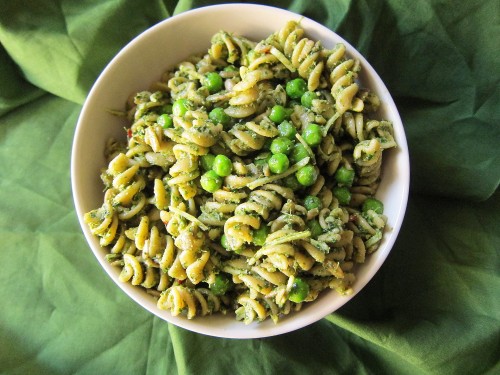
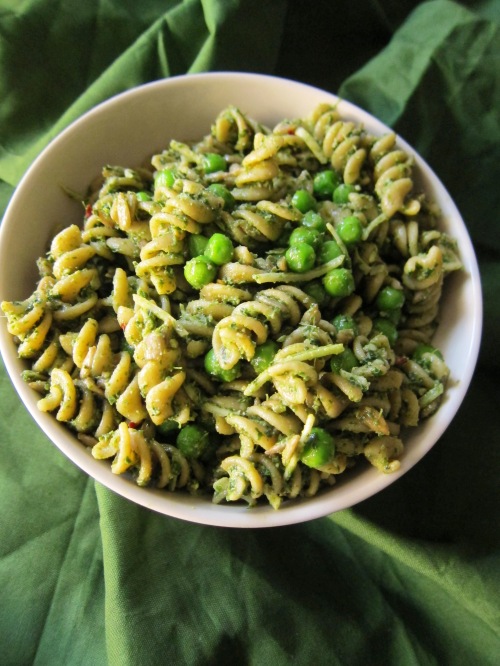
Pasta, Pesto, and Peas

IMG_3614


I love one pot meals.  I love being able to build layers and layers of flavor in one dish.  And it’s usually in the form of pasta for me.  I usually do meal prep for at least two days on Sundays.  Being able to reach in the fridge without having to do any additional food preparation is really a help with an impatient toddler.  

IMG_3615

This dish is quite decadent.  For a friend lunch I had at home, I was able to serve this with sandwiches and salad, without any leftovers.  It’s a great side dish you would similarly get in a cafe or bistro that you can make yourself at home.

For dinner, this pasta dish would be wonderful with grilled chicken or a great piece of salmon.

Pasta, Pesto, and Peas

adapted from Ina Garten

Ingredients:

  • 1 lb fusilli pasta
  • 1 and 1/2 cups pesto
  • 1 (10 oz) frozen spinach, thawed and squeezed dry
  • 3 tbsp lemon juice
  • 1 cup mayonnaise
  • 1/2 cup freshly grated Parmesan
  • 1 and 1/2 cup frozen peas
  • 1/3 cup pine nuts (I used sunflower seeds because it’s what I had on hand)
  • 1 tsp kosher salt
  • 1 tsp ground black pepper

Directions:

  1. Cook the fusilli pasta in salted water to al dente per the pasta instructions.  Drain and cool to room temperature.
  2. In the bowl of a food processor fitted with a steel blade, puree the pesto, spinach, and lemon juice.
  3. Add the mayonnaise and puree.
  4. Add the pesto mixture to the cooled pasta.
  5. Add the Parmesan, peas, pine nuts, salt, and pepper.
  6. Mix and test for salt and pepper.  Serve at room temperature.


2 Comments

Filed under Pasta, Side Dish, Vegetarian

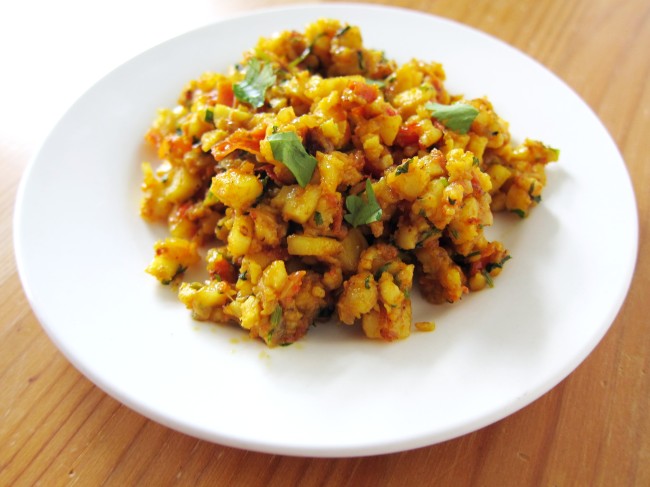
Paneer Bhurji

Image

I have a bone to pick with my parents.  They never introduced me to enough Indian “street food” or chaat.

A year ago, I stopped off at a local Indian grocery store for a quick samosa and was instantly drawn to the long line at the chaat portion of the store.  I, like usual, watched what everyone was ordering and just went for it.

Who knew an order of aloo paratha with paneer bhurji would be so life changing?  After that, I went on to try aloo tikki, pani puri, golgappa, pav bhaji, etc.

I felt more cheated than ever.  When I asked my mom why she held out, my mom’s only non-responsive response is, “We should try to make it ourselves.”  And, just like that I’m on a new mission to make all my favorites – starting with this favorite.

Paneer Bhurji

Ingredients:

  • 1 cup paneer, grated (you could also try firm tofu)
  • 1 onion, finely chopped
  • 1 tsp ginger/garlic paste
  • 1/2 serrano, finely chopped (remove seeds if you want less heat)
  • 1 tomato, finely chopped
  • 1/8 tsp turmeric powder
  • 1/4 tsp ground cayenne pepper
  • 1/8 tsp cumin powder
  • 1/2 tsp coriander powder
  • 1 pinch garam masala
  • salt, to taste
  • 1/4 cup cilantro, chopped, divided

Directions:

  1. Heat oil in a large pan over medium heat.  Once oil is hot, add onions and cook until translucent, about 4 minutes.  Add garlic/ginger paste and serrano pepper and cook until soft, about 3 minutes.
  2. Add turmeric, cayenne, cumin, coriander and garam masala, and cook until the raw smell of the spices is gone, about 3 minutes.
  3. Add the grated paneer and stir to incorporate with the onion/garlic/ginger mix.  Cook for about 5 minutes until the paneer is soft.
  4. Add half of the cilantro and allow it to wilt in the heat and mix to incorporate.
  5. Remove from heat and garnish with additional cilantro.

3 Comments

Filed under Breakfast, Indian, Vegetarian

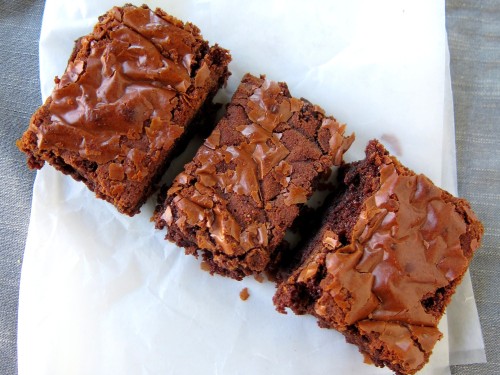
Brownies [ w/ Melted Chocolate ]

IMG_3517

I love brownies.  They are my go-to dessert when I need comfort in the form of chocolate.  I do have a problem.  I cannot pick a favorite brownie recipe.  Maybe you can help me out.  Here is what I know about brownies:

–  Has to be fudgy.
–  Not cakey.
–  Has to have top flaky layer.
–  No nuts.
–  Has to exude chocolate.

IMG_3530

With that said, I rely on two recipes and have many more on my to-do list.  The first  one I’d like to share with you involves melted chocolate (as opposed to cocoa powder).

The results?

–  Definitely fudgy.
–  Definitely has the top flaky layer.
–  Definitely chocolatey.

I loved every bite.  It had a chew and soft enough to melt in my mouth.  With that said, I think I’ll look to see if other recipes really pack more of a chocolate punch.

IMG_3534

What’s your favorite brownie recipe?

Brownies (with melted chocolate)

barely adapted from Allrecipes.com

Ingredients:

  • 1/2 cup granulated sugar
  • 2 tbsp butter
  • 2 tbsp water
  • 1 and 1/2 cup semi-sweet chocolate chips
  • 2 eggs
  • 1 tsp vanilla extract
  • 2/3 cup all-purpose flour
  • 1/4 tsp baking soda
  • 1/2 tsp salt

Directions:

  1. Preheat the oven to 325F.  Grease an 8×8 inch square pan.
  2. In a medium saucepan, combine the sugar, butter and water.  Cook over medium heat until boiling.  Remove from heat and stir in chocolate chips until melted and smooth.
  3. Mix in the eggs and vanilla.
  4. In a separate bowl, combine the flour, baking soda and salt.
  5. Stir into the chocolate mixture.
  6. Spread evenly into the prepared pan.
  7. Bake for 25-30 minutes.  Start checking after 25 minutes because you don’t want to overbake.  Cool in the pan and cut before serving.


8 Comments

Filed under baking, Brownies, Desserts

Home Fries

IMG_3493

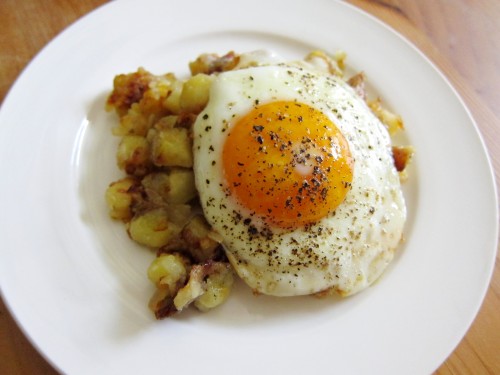
Saturday breakfasts are sorta my thang now.  Sundays are usually donut days, and weekdays are quick toast and egg or oatmeal days.  Saturday mornings, despite the pancake debacle, have become a special time of week for us.  I usually wake up an hour before everyone and get things started without any interruption.  It’s a glorious time – no screaming, no asking for anything, and total control of my kitchen.

IMG_3499

I have attempted home fries many times in the past.  I have usually been left with something of a mish-mash that resembles coarse mashed potatoes.  Nothing about that is right.  I recently attempted it again determined to get it right.  And, huzzah – going into the repertoire.  Under a farm fresh over-easy egg, it’s just heaven.

Home Fries

barely adapted from Smitten Kitchen

Ingredients:

  • 2 pounds Yukon gold potatoes, cubed into 1/2 inch pieces
  • 4 tbsp butter
  • 1 medium onion, finely chopped
  • 1 large garlic clove, minced
  • salt and pepper to taste

Directions:

  1. Arrange potatoes in large microwave-safe bowl, top with 1 tablespoon butter, and cover tightly with plastic wrap.  Microwave until edges of potatoes begin to soften, about 5 to 7 minutes, shaking bowl (without removing plastic) to redistribute potatoes halfway through cooking.
  2. Melt 1 tablespoon butter in large nonstick skillet over medium heat.  Add onion and cook until softened, about 4 minutes. Add garlic and cook for an additional two minutes until the onions are golden brown.  Transfer to small bowl.
  3. Melt remaining 2 tablespoons butter in now-empty skillet over medium heat. Add potatoes and pack down with spatula.  Cook, without moving, until underside of potatoes is brown, 5 to 7 minutes.  Turn potatoes, pack down again, and continue to cook until well browned and crisp, 5 to 7 minutes.  Reduce heat to medium-low and continue cooking, stirring potatoes every few minutes, until crusty and golden on all sides, 9 to 12 minutes.  Stir in onion, seasonings of your choice and salt and pepper to taste.  Try not to mess with the potatoes too much because you don’t want to break them apart.

8 Comments

Filed under Breakfast, Side Dish, Vegetarian

Tres Leches

IMG_3347

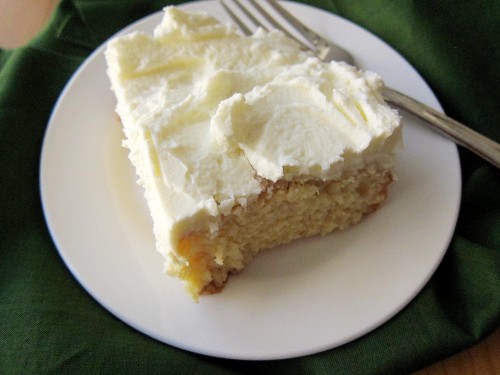
As we approach Cinco de Mayo, I look forward to great food.  Guacamole.  Fajitas.  Chips and salsa.  Mexican wedding cookies.  Tres leches cake.  After having a slew of spicy and flavorful dishes, this cake is a light and cool dessert that absolutely fits the bill.

IMG_3350

As if I need a reason to make and eat this cake.  A cake soaked in a blend of sweet milks and covered in fresh whipped cream.  I say, have it all-year round.  Birthdays, weekends, found-another-sweetened-condensed-milk-can-in-your-pantry days.  I definitely don’t need a reason.  Just a fork.

Tres Leches

adapted from Allrecipes

Ingredients

1 and 1/2 cups all-purpose flour
1 teaspoon baking pow der
1/2 cup unsalted butter
1 cup white sugar
5 eggs
1/2 teaspoon vanilla extract
2 cups whole milk
1 (14 ounce) can sweetened condensed milk
1 (12 fluid ounce) can evaporated milk
1 and 1/2 cups heavy whipping cream
1 cup white sugar
1 teaspoon vanilla extract

Directions:

1. Preheat oven to 350F.  Grease and flour one 9×13 inch baking pan.
2. Sift flour and baking powder together.  Set aside.
3. Cream butter and the 1 cup sugar together until fluffy.  Add eggs and the 1/2 teaspoon vanilla extract; beat well until fully incorporated.
4. Add the flour mixture to the butter mixture 2 tablespoons at a time; mix until well
blended. Pour batter into prepared pan.
5. Bake at 350F for 30 minutes. Pierce cake several times with a fork.
6. Combine the whole milk, condensed milk, and evaporated milk together. Pour over the
top of the cooled cake.
7. Whip whipping cream, the remaining 1 cup of the sugar, and the remaining 1 teaspoon
vanilla together until thick in a stand mixer.  Spread over the top of cake.  Place cake in fridge until time to serve.

4 Comments

Filed under baking, Cake, Desserts

Banoffee Pie

Image

My career, in my opinion, has taken a nose dive since the baby was born.  Going from a 100 hr/week attorney to a part-time attorney has been a major hit on my career self-esteem.  So, when one of my cases recently was scheduled for back to back depositions and a settlement conference, it was my time to get back on the work horse.  And, I loved it.

After very successful depositions, I marched into the settlement conference with dare I say — a swagger.  My client and I sat in one room while the opposing party was in another and the attorneys were to walk back and forth with settlement offers.  Walking back to my client’s room, I happily thought that I put aside the mom clothes and was back to my old self.  I took one step inside my client’s waiting room when she said, “I think you sat in chocolate.”  Mortified, I stood there for a minute attempting to salvage this most unprofessional situation.  But, she was right.  Somewhere between feeding my kid a chocolate chip granola bar and driving, I sat in it.  Oh, and my suit was tan/light brown.  It paired well with my dark chocolate chip stain.

IMG_3323

Luckily, my client quickly said, “Oh, I figured your son did that,” and went on about her life as a mom.  And, there I was – in my professional element, exchanging mom advice with my client.  The settlement went well and on the drive home, I accepted the duality that has become my life, where the mom part is the base and everything else is seemingly built around that.  When I got home, I celebrated by making a pie.  No chocolate.

Banoffee Pie

Ingredients:

  • 2 cups graham crackers, finely crushed into crumbs
  • 1 stick unsalted butter, melted
  • 2 (14 oz) cans dulce de leche 
  • 4 large bananas, sliced
  • 2 heavy whipping cream, cold
  • 3 tbsp confectioner’s (powdered sugar)
  • 1 tsp vanilla extract

Directions:

  1. Preheat oven to 350F.
  2. In a 9-inch pie plate, mix together the graham crackers and butter, and evenly press into the pie plate for the crust.  Bake for 5 minutes to set the crust.  Set aside to cool.
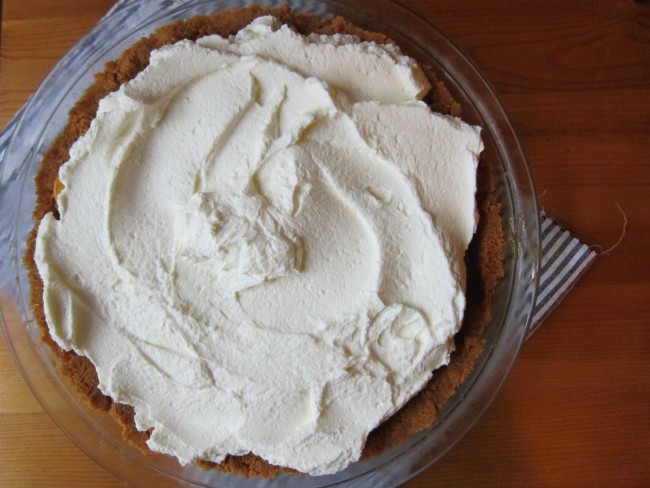
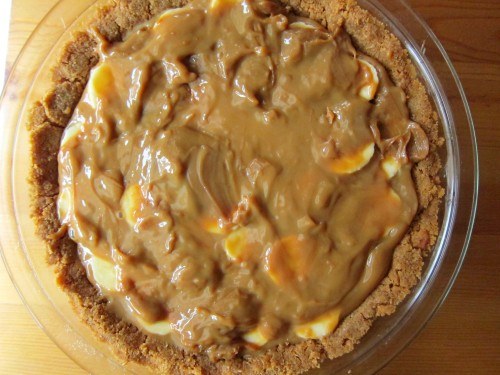
  3. Once the crust is cooled, spread the dulce de leche from one can over the crust.  Layer with bananas.  Finish with the last can of dulce de leche.
  4. Chill in a refrigerator.
  5. Make the whipped cream:  With a stand or handheld mixer, whip the heavy cream, sugar and vanilla until stiff.  Spread evenly over the cake.  Serve immediately or put back in the fridge to chill.

4 Comments

Filed under Desserts, Pie

Dulce De Leche (The Easy Way)

Image

Remember when I slaved over a pot of boiling milk to get about 1 cup of dulce de leche?  Yeah, turns out that’s not going to be happening anymore.  Why?  Ask my kid who finds it fun to tug at my pants and grasp onto my leg for dear life just to be picked up every 5 minutes.  It’s also hilarious when he pretends he has cooked noodles for legs when I try to set him back down.

IMG_3320

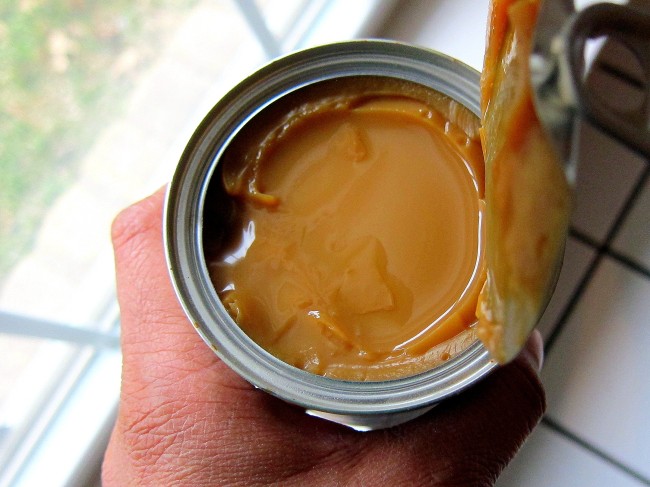
You could extend a sigh of frustration with me.  Or, you could ask why a mom who has more than enough on her plate couldn’t just buy a bottle of it?  Or perhaps just not make it altogether because it really isn’t a necessity like maybe … dinner?  I call those non-options.  And, you’ll agree when you see what I’ve done with two beautiful cans of pure decadence, without all the stirring.

Dulce De Leche (The Easy Way)

Ingredients:

  • Cans of sweetened condensed milk
  • Large pot with a heavy bottom with a lid

 Directions:

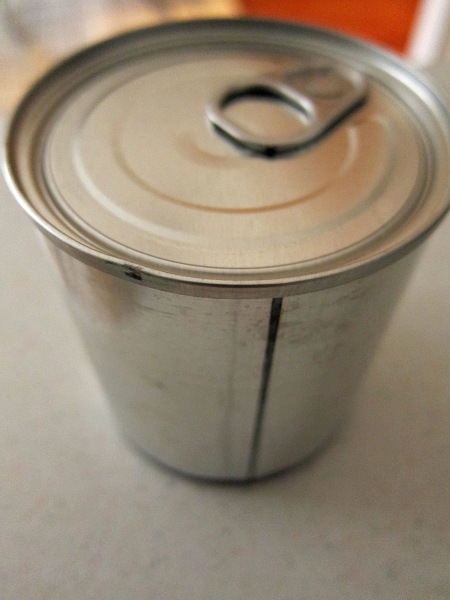
  1. Place the cans of condensed milk in the pot.  Fill the pot with water.  The water should fully cover the cans.
  2. Place the pot on the stove and bring the water to a boil over medium high heat.
  3. Once at a boil, cover and reduce the heat to medium to keep it at a simmer.
  4. Check the water level every 30 minutes to make sure that the cans are all well submerged.
  5. After three hours, turn off the stove and move the pot with lid off the heat (to another burner).  Jut let everything cool down.  Once the water is cool, remove the cans and place on a towel to cool to room temperature.
  6. Do not use any cold water, ice or any cooling procedure to make the cans colder faster.

1 Comment

Filed under Custard/Pudding, Desserts, Frostings & Fillings

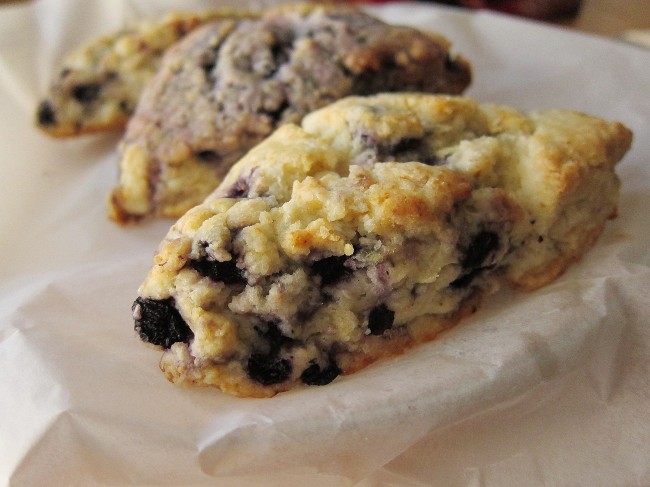
Blueberry Scones

Image

Last week was ridiculous.  Between two trips to the emergency room for a baby whose 104-105 fever wouldn’t break for 3 days (with medicine), and work deadlines that didn’t take notice at all of my personal schedule, I’m physically and emotionally spent.

For instance, after 2 days of a high fever, we thought we were in the clear when the baby’s temperature went down to 99.  And, after 48 hours of no sleep, we thought to take a nap at 3:00 a.m.  At 5:00 a.m., turns out the temperature went down to 94, which is bad bad bad.  Helpless is the word.  Oh, and also sleep deprived.

Spent.

As in, I want to hide under my bed covers and sleep for a month….and wake up only for these scones.

I made these scones as a way to use up my frozen blueberries, and to also have a special breakfast treat for several days during the week.  With such a short ingredient list, you’re likely to have everything on hand.  And after a week like mine, I’ll call that a win.  Add a cup of dark coffee, and I can almost see a light at the end of the tunnel.

Blueberry Scones

barely adapted from Tyler Florence

Ingredients:

  • 2 cups all-purpose flour
  • 1 tablespoon baking powder
  • 1/2 teaspoon salt
  • 2 tablespoons sugar
  • 5 tablespoons unsalted butter, cold, cut in chunks
  • 1 cup fresh or frozen blueberries (if frozen, make sure its thawed and drained)
  • 1 cup heavy cream, plus more for brushing the scones

Directions:

  1. Preheat the oven to 400 F.
  2. Sift together the flour, baking powder, salt, and sugar.
  3. Cut in the butter with a fork until the mixture look like coarse crumbs.
  4. Fold the blueberries into the batter. Be careful and gentle to where you don’t break the blueberries because the color will bleed into the dough.
  5. Make a well in the center and pour in the heavy cream. Fold everything together just to incorporate; do not overwork the dough.
  6. Press the dough out on a lightly floured surface into a rectangle about 12 x 3 x 1.5 inches. Cut the rectangle in half then cut the pieces in half again, giving you 4 squares. Cut each square in half diagonally.
  7. Place the scones on an ungreased cookie sheet and brush the tops with a little heavy cream. Bake for 15 to 20 minutes until beautiful and brown.

2 Comments

Filed under baking, Breakfast, Vegetarian

Banana Pudding

Image

The title should really be – Best. Banana. Pudding. Ever. Ever.

As a Texan, I take my banana pudding pretty seriously.  I’ve seen serious atrocities attempt to pass as banana pudding.  My ideal banana pudding must be vanilla pudding, with banana and vanilla wafer cookies.  The most important part to know is that it’s vanilla pudding with bananas.  Not banana flavored pudding.  But, the banana flavor, after sitting, will get into the vanilla pudding.

Image

I totally agree the ingredients in this recipe may not be the most traditional, but oh good gravy it’s good.  The sweetened condensed milk adds the perfect amount of sweetness while the whipped cream keeps it light.  The vanilla wafers get cakey after sitting and these seemingly separate ingredients blend wonderfully.  Cohesion – it works.

Banana Pudding

barely adapted from Food Network

Ingredients:

  • 1 box mini vanilla wafers
  • 6 bananas, sliced
  • 2 cups whole milk
  • 1 (5-ounce) box instant French vanilla pudding
  • 1 (8-ounce) package cream cheese, softened
  • 1 (14-ounce) can sweetened condensed milk
  • 1 (12-ounce) container frozen whipped topping thawed, or equal amount sweetened whipped cream

Directions:

  1. Line the bottom of a 9 x 13 inch dish with wafers and layer bananas on top.
  2. In a bowl, combine the milk and pudding mix and blend well using a handheld electric mixer.
  3. Using another bowl, mix the cream cheese and condensed milk until smooth. Fold the whipped topping into the cream cheese mixture. 
  4. Add the cream cheese mixture to the pudding mixture and stir until well blended. 
  5. Pour the mixture over the cookies and bananas and cover with the remaining bananas and then cookies.
  6. Refrigerate until ready to serve.

8 Comments

Filed under Custard/Pudding, Desserts, Favorites