Monthly Archives: September 2012

Panjiri

Traditionally in India, after a woman gives birth, the nursing mother is given panjiri.  While seemingly healthy as it is chock full of dried fruit and nuts, more notable is the fact that panjiri is laden with ghee/butter and sugar.  Yet, new grandmothers will tout that this is the greatest snack for new and nursing moms.  I’m somewhat at a loss of how all the butter/ghee and sugar could be healthy.  Moreover, it’s supposed to increase the milk supply.  Again, don’t ask me how.

This dish will take quite some time to make.  It is absolutely a labor of love.  Similar to dulce de leche or caramelizing onions, roasting the nuts, fruits and semolina/suji will take some time.  But, I promise you that the end result is absolutely worth the wait.

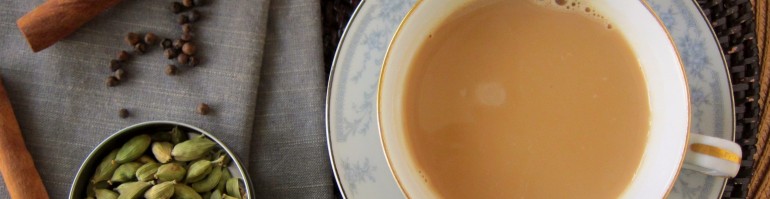
I cannot attest to whether my milk supply was increased or aided, I can promise you it is delicious.  You can pretty much customize the ingredients to what you have on hand.  Clockwise from top: (1) golden raisins, (2) unsweetened grated coconut, (3) pistachios, (4) walnut, (5) dried apricot, (6) almonds, (7) cashew, and (8) flax-seed meal (center).

And, traditionally, you will see that panjiri contains many different spices and edible gum crystals.  I don’t prefer to have this dish overly spiced and have made it using ingredients that I’m likely to have on hand.

When you make this dish, ignore the health conscious part of your brain that wants to reduce the butter/ghee.  Just add it.  Throw it in and never look back.  You will not regret it.  And you may notice, I keep saying butter/ghee.  I highly recommend ghee, but I also like to cut the full-flavor of the ghee with some butter.  If you end up using all butter, you’ll miss the depth of flavor that ghee offers, but still have a product reminiscent of a sugar cookie – no joke.

If you are interested, as a nursing mother, to increase milk supply, I highly recommend keeping the fennel.  If you don’t have fennel or don’t like it, leave it out altogether.  

Panjiri

Ingredients:

  • 1/2 cup ghee, divided
  • 1/2 cup unsalted butter, divided (if you want to just use ghee – just replace it all with ghee)
  • 2 tsp fennel seeds (optional)
  • 1 cup mixed nuts
  • 1/2 cup mixed dried fruit
  • 1/4 cup flax-seed meal (optional)
  • 2 cups semolina (suji – coarse)
  • 1/2 tsp salt
  • 1/2 tsp cardamom powder
  • 1/4 tsp ground ginger
  • 1/2 cup white sugar

Directions:

  1. In a large pan, heat 1/4 cup ghee and 1/4 cup butter over medium heat until melted, but not burned.  Add in fennel seeds and cook for a minute just to heat up.  Add in mixed nuts, dried fruit, and flax-seed meal and roast until toasted and the smell of the nuts come through, approximately 10 minutes.  Just make sure to stir occasionally so it doesn’t burn.  Once roasted, remove the mixture from the pan.
  2. In the same emptied pan (be careful not to leave left over pieces), heat the remaining ghee and butter until melted over medium-low heat.  Add the semolina and roast until roasted into a light brown and resembles wet sand.  This is going to take a while – approximately 30-40 minutes.  Do not be tempted to raise the temperature.
  3. Add salt, cardamom, and ginger, and stir to combine and blend.  Cook for another 10 minutes.  Remove from the heat, add sugar and mix until fully incorporated and blended.
  4. Let cool and then serve.  Store in an airtight container.


7 Comments

Filed under Breakfast, Indian, Snacks, Vegetarian

Chocolate Peanut Butter Pie

Friends come.  Most go.  Some stay.  Few stay through it all.  Through heartache, fights, distance, late night consoling, weddings, birth, death, and everything else.  For those people, there should be a word more meaningful than friends.  I’m very fortunate to have one of those friends.  We met in college, became roommates, and have stayed great friends since.  For fear of jinxing anything by calling her my best friend, I just call her – well, I call her whatever I can think of.  I’m obviously on the better side of this friendship deal.

Seeing each other through all of life’s ups and downs, we make it a point to keep in touch.  Luckily we live about 30 minutes apart and meet up once a month.  What started as a girls’ night out has now become a couples’ night in since the baby.  Our girls’ night out was a dinner followed by a guilty-pleasure movie.  Ninety percent of the time, we’d end up missing the movie because we’d be too busy catching up on life, including but not limited to husbands, family, celebrities, work, and dessert.  Always dessert.  Despite moving the party indoors, dessert is still mandatory.  And, for these type of friends, the no-nonsense, solid friends, you need a dessert of the same caliber.

Some people are meant to be pairs.  She is that one.  The macaroni to my cheese.  The cookies to my milk.  The chocolate to my peanut butter.

Chocolate Peanut Butter Pie

barely adapted from The Pioneer Woman

Ingredients:

  • 26 Oreos, divided
  • 4 tbsp unsalted butter, melted
  • 1 cup creamy peanut butter
  • 1 (8 oz) package cream cheese
  • 1 and 1/4 cup powdered sugar
  • 1 (8 oz) package Cool Whip, thawed

Directions:

  1. Preheat oven to 350F.
  2. Make the crust: In a food processor, process 25 Oreos until they become fine crumbs.  Pour melted butter over the crumbs and stir to moisten and combine.  Press into a pie pan and bake for 5-7 minutes until the crust has set.  Remove the pie from the oven and allow it to cool completely.
  3. Make the filling:  In an electric stand mixer, cream the cream cheese.  Add the peanut butter and beat with the cream cheese until incorporated.  Slowly add the powdered sugar and beat until smooth.  Add the Cool Whip and mix until well combined, scraping down the sides as needed.
  4. Pour the filling into the cooled crust.  Spread to even out the filling.
  5. Loosely crumble the one remaining Oreo and sprinkle over the pie for decoration.
  6. Cover and freeze for at least 2 hours to set.

4 Comments

Filed under Desserts, Pie

Spinach & Cheese Manicotti with Homemade Marinara Sauce

When I was pregnant, I prepared and froze meals to heat up after the baby was born.  The baby is now a sprouting 9 month old and I still prepare frozen meals.  It’s a great way to ensure that there’s always food in the house without worrying about spoilage.  My favorite freezer meals are of the Italian-inspired variety.  While, I usually always make lasagna, I wanted to change things up and try manicotti.

And, while I usually use store-bought marinara, I was all out and made my own.  With simple ingredients cooked slowly, the resulting sauce was astounding.  Full of flavor and fresh unlike some jarred sauces you may run across.  I can’t wait to try more variations for different types of pasta dishes!

Spinach & Cheese Manicotti

adapted from Allrecipes.com

Ingredients:

  • 1 (8 oz) package of manicotti shells
  • 1 (15 oz) container of ricotta cheese
  • 1 (10 oz) package of frozen spinach, thawed, drained, squeezed dry and chopped
  • 1/2 cup onion, minced
  • 2 cloves garlic, minced
  • 1 egg
  • 1 tbsp parsley, minced
  • 1/2 tsp ground black pepper
  • 1/2 tsp salt
  • 1/2 tsp garlic powder
  • 1 big pinch of nutmeg
  • 2 cups mozzarella cheese, shredded (divided)
  • 1/2 cup Parmesan cheese, grated (divided)
  • 4 cups marinara sauce, recipe below

Directions:

  1. Preheat oven to 350F.
  2. In a large bowl, mix together ricotta, spinach, onion, garlic, egg, parsley, pepper, salt, garlic powder, and nutmeg until well combined.  Stir in 1 cup mozzarella cheese and 1/4 cup Parmesan cheese.
  3. In a 9 x 13 baking dish, spread 1 cup of marinara sauce.  Spoon the filling into a large plastic or piping bag.  Snip the corner and squeeze the filling into the uncooked manicotti shells.
  4. Place each filled shell into the marinara sauce.  Fill up the remaining shells and lay them over the marinara in a single layer.
  5. Cover the pasta with the remaining marinara.  Sprinkle the remaining mozzarella and Parmesan cheese over the pasta dish.  (If you want to make a freezer meal, stop here and cover for freezing.)
  6. Cover the baking dish with foil and bake for 45 minutes.  Remove the foil and cook for an additional 15 minutes.

Marinara Sauce

barely adapted from Giada De Laurentiis

Ingredients:

  • 1/4 cup olive oil
  • 1 medium onion, finely chopped
  • 2 garlic cloves, finely chopped
  • 2 stalks celery, finely chopped
  • 2 carrots, peeled and finely chopped
  • 1/2 tsp sea salt
  • 1/2 tsp ground black pepper
  • 1/4 tsp red pepper flakes
  • 2 (32 oz) cans crushed tomatoes
  • 2 dried bay leaves

Directions:

  1. In a large casserole pot, heat the oil over a medium-high heat.
  2. Add the onions and garlic and saute until the onions are translucent, about 10 minutes.
  3. Add the celery, carrots, and 1/2 teaspoon of each salt, pepper, and red pepper flakes.
  4. Saute until all the vegetables are soft, about 10 minutes.
  5. Add the tomatoes and bay leaves, and simmer uncovered over low heat until the sauce thickens, about 1 hour.
  6. Remove and discard the bay leaf. Season the sauce with more salt and pepper, to taste.


4 Comments

Filed under Italian, Pasta, Sauces, Vegetarian

Creamy Herb Dip

Whether just for snacking, or for a quick appetizer for a gathering or just because you feel like it, it’s always nice to have a herb dip in your recipe belt.  While I usually pair veggies with hummus, this dip is a great alternative to my usual.  In addition, I’m more likely to have these ingredients on hand at all times.  And, for my veggie-hating friends, this also pairs nicely with water crackers and my favorite kettle sea salt potato chips.  But, this creamy – dare I say zippy – dip is just magnificent with fresh-cut vegetables.

I actually served this to a veggie and mayo-hating friend of mine.  As he ate the dip with chips, he gave it rave reviews.  The ingredients mesh to be greater than the sum of themselves.  What that means is that he didn’t taste any mayo or the shallots, which is an ultimate no-no.  Without masking each other, every ingredient plays a role and shines through in this cohesive dip.

Herb Dip

adapted from Ina Garten

Ingredients:

  • 1 (8 oz) package cream cheese, room temperature
  • 1/2 cup sour cream
  • 1/2 cup mayonnaise
  • 2 tbsp shallots, minced
  • 1 green onion, minced
  • 1 clove garlic, minced
  • 2 tbsp fresh parsley, minced
  • 1 tbsp fresh dill, minced
  • 1 tsp kosher salt
  • 3/4 tsp fresh ground black pepper
  • 4 dashes of hot sauce (i.e. Tabasco) – adjust to taste

Directions:

  1. Place the cream cheese, sour cream, mayo, shallots, green onion, garlic, parsley, dill, salt, pepper and hot sauce in the bowl of an electric mixer.  Mix on medium-high with the paddle attachment until all the ingredients are incorporated and smooth.
  2. Serve at room temperature.


10 Comments

Filed under Appetizers

Cinnamon Sugar & Vanilla Roasted Peaches

As summer is packing its bags, I wanted to enjoy the last fruits of its bounty.  My favorite this summer has been stone fruits – specifically, peaches.

My first experience with peaches – were from a can.  And, I loved them.  I’m not ashamed of my love.  Sweet and juicy without any fuzz, canned peaches were all I knew until we got older.  And, I hate to say it but there’s still a place in my heart for the syrupy peaches in all its almost-candy-like qualities.  As I’ve gotten older, I cannot remember the last time I bought fruit of any kind in a can.  Yet, I still find myself remembering school lunches where the fruit was canned peaches.  Take that how you will.

Wanting something similar but much much better, roasting seemed to be a great way to bring out the fruit’s flavor.  I was right.  The word is caramelized.  Peeled blanched peaches mixed with warm flavors highlights this most succulent fruit without being overly sweet.  While you can eat it all on its own, why not pair it with fresh whipped cream or ice cream?  Share with friends as it comes together so very quickly with ingredients that you most likely have on hand.

Just like summer, this dish won’t last long.

Cinnamon Sugar & Vanilla Roasted Peaches

adapted from Martha Stewart Everyday Food

Ingredients:

  • 2 tbsp unsalted butter, melted
  • 2 tbsp orange juice
  • 2 tbsp white granulated sugar
  • 1/2 tsp ground cinnamon
  • 1 tsp vanilla extract
  • 4 ripe peaches

Directions:

  1. Blanch the peaches:  Score the bottom of the peaches with an X and put them in boiling water for 2 minutes.  Peel, remove pits and halve. Place in a bowl.  Reserve juice.
  2. Preheat oven to 400F.
  3. In a large but shallow baking dish whisk together the butter, orange juice, sugar, cinnamon, vanilla extract, and the reserved juice from the peaches.
  4. Add peaches and turn them to coat well.  Arrange them cut side down in a single layer.
  5. Roast until peaches are tender and the liquid is thick like syrup, approximately 20 minutes, brushing the peaches with the liquid half-way through baking.
  6. After the syrup has thickened, turn the peaches around, cut side up and put under the broiler for a minute until browned.
  7. Serve hot with ice cream or whipped cream or both.  Drizzle with the remaining liquid.

5 Comments

Filed under Uncategorized

Banana Bread

Call this a staple.  Everyone should have a banana bread recipe in their collection.  And I’m ready to hear what your favorites are because after many years of searching, I’m pretty sure I’ve found the one.  The one that can make mothers forget why you picked a fight with them last week – er, and  yesterday.  The one that can win over mother in-laws.  The one that you don’t just make because you have ripe bananas, but the one that you wait for bananas to ripen so that you can make.  The one that has been tried and tested everyday for a week and still tastes great.

Have I lost you?  Let’s back up.  Banana bread is easy … and it’s hard.  First, it’s easy because it is an easy way to use up a lot of ripe bananas.  I tend to stock up.  My fault because once I see a speckle, I will not eat it.  Second, it’s easy because I haven’t tasted a banana bread that didn’t have banana flavor.  That leads to the hard part of banana bread.  Who knew it was so complicated?  Almost all banana breads I’ve made and tried tend to be gummy, too dense and greasy.  All except for this.  After some considerable searching, I found a recipe that is packed with banana flavor without the weight, and a sugary crust that make each bite as wonderful as the first.  Let’s say that bread should be bready and this remained bready for four days after – the longest I could the bread around in my house.

A slice of this and my mom forgot all about my bad attitude.  For a solid day.  There’s magic in this bread.

Banana Bread

adapted from Annie’s Eats via Cooks Illustrated

Ingredients:

  • 1¾ cups all-purpose flour
  • 1 tsp. baking soda
  • ½ tsp. salt
  • 5 large, very ripe bananas, peeled
  • ½ cup unsalted butter, melted and cooled slightly
  • 2 large eggs
  • ¾ cup packed light brown sugar
  • 1 tsp. vanilla extract
  • 2 tsp. granulated sugar

Directions:

  1. Preheat the oven to 350˚ F.  Lightly spray a loaf pan (about 9 x 5 inches) with cooking spray.
  2. In a medium bowl, combine the flour, baking soda and salt; whisk together, and set aside.
  3. Place 5 bananas in a microwave safe bowl.  Cover with plastic wrap and make several slits in the wrap to allow steam to escape.
  4. Microwave on high until the bananas are soft and have released liquid, about 5 minutes.  Transfer the bananas to a fine mesh strainer set over a medium bowl and let drain, stirring occasionally, about 15 minutes (you should have ½-¾ cup liquid).
  5. Transfer the reserved banana liquid to a medium saucepan over medium-high heat.  Cook until reduced to about ¼ cup, approximately 5-10 minutes.  Remove the pan from the heat.
  6. In a large bowl, combine the bananas and the reduced banana liquid.  Mash with a fork or whisk until fairly smooth.  Whisk in the melted butter, eggs, brown sugar and vanilla.
  7. Add the flour mixture to the bowl with the banana mixture.
  8. Fold together, just until all of the dry ingredients are incorporated.  Do not over-mix the batter.  Pour the batter into the prepared pan and smooth with a spatula.
  9. Sprinkle the sugar evenly over the assembled loaf.
  10. Bake until a toothpick inserted in the center comes out clean, 55-75 minutes.
  11. Transfer to a wire rack and allow to cool at least 15 minutes in the pan before removing.

12 Comments

Filed under baking, Bread, Favorites

Mango Quinoa Salad with Orange Cardamom Dressing

With summer coming to a close, I’m desperately clinging to all the seasonal fruit I can get my hands on.  Bar none, mango is my absolute favorite fruit.  I rarely cook or use it in a dish because I always end up eating it just as it is.  However, when I recently tried a mango salsa, I was motivated to start using it in dishes to give a vibrancy to capture the essence of summer.

I developed this recipe to satisfy my sweet tooth and also to add to my breakfast/brunch options.  Combining mango and mint with earthy quinoa, raisins and nuts offers different dimensions of flavor in a dish that packs a nutritional punch.  Adding the orange-honey-cardamom dressing is just the icing on the healthy cake.

Fruity Quinoa Salad

Ingredients:

  • 1 cup quinoa, rinsed and drained
  • 2 cups water
  • pinch of salt
  • 1 tbsp unsalted butter
  • 1/8 cup golden raisins, roughly chopped
  • 1/4 nuts (I used a mix of chopped almonds, pecans, cashews and walnuts)
  • 1 large mango, peeled and diced
  • 2 tbsp mint leaves, finely chopped
  • 1 tsp orange zest
  • 1/2 cup fresh orange juice
  • 2 tbsp honey
  • 1/4 tsp vanilla extract
  • 1/8 tsp ground cardamom

Directions:

  • Cook the quinoa.  Heat a saucepan over medium heat.  Roast the quinoa for about 3 minutes in the hot saucepan, stirring occasionally.  Add water, stir and turn up heat to medium high and bring to a boil.  Turn down heat to simmer and cover with a lid.  Cover and cook for 15 minutes.  Turn off stove and remove from the heat for about 5 minutes.  Uncover and fluff with a fork.  Set aside to cool to room temperature.
  • In a pan, melt butter and add raisins and nuts.  Stir to coat and cook until the raisins plump up a bit and the nuts a roasted, about 5 minutes.  Set aside to cool.
  • In a large bowl, add the quinoa, nut mixture, mango and mint.
  • In a small bowl, mix together the orange zest, orange juice, vanilla extract and cardamom.  Pour over salad until fully coated.
  • Let mixture sit for about 15 minutes before serving.

2 Comments

Filed under Breakfast, Side Dish, Vegetarian